

Key Takeaways
- Engine air filters typically need replacement every 15,000-30,000 miles, but driving conditions matter more than mileage alone.
- Cabin air filters are separate components with their own service interval, usually every 15,000-25,000 miles.
- A visual inspection takes under five minutes and can tell you whether a filter is truly due for replacement.
- Dusty, rural, or stop-and-go driving environments shorten filter life significantly.
- Replacing an air filter is a DIY task most drivers can complete without special tools.
What you will need
Two Filters, Two Jobs
Most vehicles have two air filters that serve completely different purposes. The engine air filter keeps dirt, dust, and debris out of the combustion chamber, protecting internal engine components. The cabin air filter cleans the air flowing through your HVAC system - the air you and your passengers actually breathe. They wear out at different rates and show different symptoms when they're overdue.
Understanding which filter is which helps you avoid two common mistakes: replacing a filter that still has life left (an unnecessary expense) or ignoring one that's long overdue (a real cost to performance and air quality). As part of any routine vehicle maintenance schedule, both filters deserve attention on their own timelines.
Check Your Owner's Manual First
Manufacturer-recommended intervals vary significantly by vehicle. Some turbocharged engines have tighter tolerances and shorter filter life recommendations. Your owner's manual is always the authoritative starting point before applying general mileage rules.
How to Know When Each Filter Actually Needs Replacing
Engine air filter: General guidance from most automakers puts the replacement interval somewhere between 15,000 and 30,000 miles. However, that range assumes typical driving. If you regularly drive on unpaved roads, in dusty agricultural areas, or in heavy urban traffic with frequent idling, the filter accumulates contaminants faster and may need attention sooner. Signs that warrant a look include a noticeable drop in fuel economy, sluggish throttle response, or a check engine light triggered by airflow sensor readings.
Cabin air filter: Replacement is typically recommended every 15,000 to 25,000 miles, or roughly once a year for average drivers. Reduced airflow from your vents, persistent musty odors inside the car, or louder-than-usual blower motor noise are all signals. Allergy sufferers often notice degraded cabin air quality before any dashboard warning appears.
Neither filter comes with a dashboard warning light in most vehicles, which is why a periodic visual check - not just mileage math - is the most reliable approach. Skipping this step is one of many deferred habits that can lead to larger problems down the road, as outlined in our look at the real cost of skipping routine maintenance.
Don't Rely on Shop Upsells Alone
Quick-lube shops often recommend air filter replacement at every oil change interval, which is typically more frequent than most vehicles actually require. Use mileage guidelines and your own visual inspection to make an informed decision - not just the service advisor's recommendation.
How to Inspect and Replace Both Filters
Before you start, check your owner's manual for the exact filter locations and part numbers for your vehicle. Filter housing designs vary widely - some require a screwdriver, most don't.
What you will need
Locate the engine air filter housing
Open the hood and find the engine air filter housing - typically a large plastic box connected to a duct leading toward the engine intake. On most modern vehicles it is clearly visible near the top of the engine bay. Refer to your owner's manual if you're unsure.
Open the housing and remove the filter
Release the clips, latches, or screws holding the housing cover in place. Carefully lift out the filter, noting which direction it sits - you'll reinstall a new filter the same way. Do this over a trash bag or outdoors to avoid dropping debris into the intake.
Inspect the filter visually
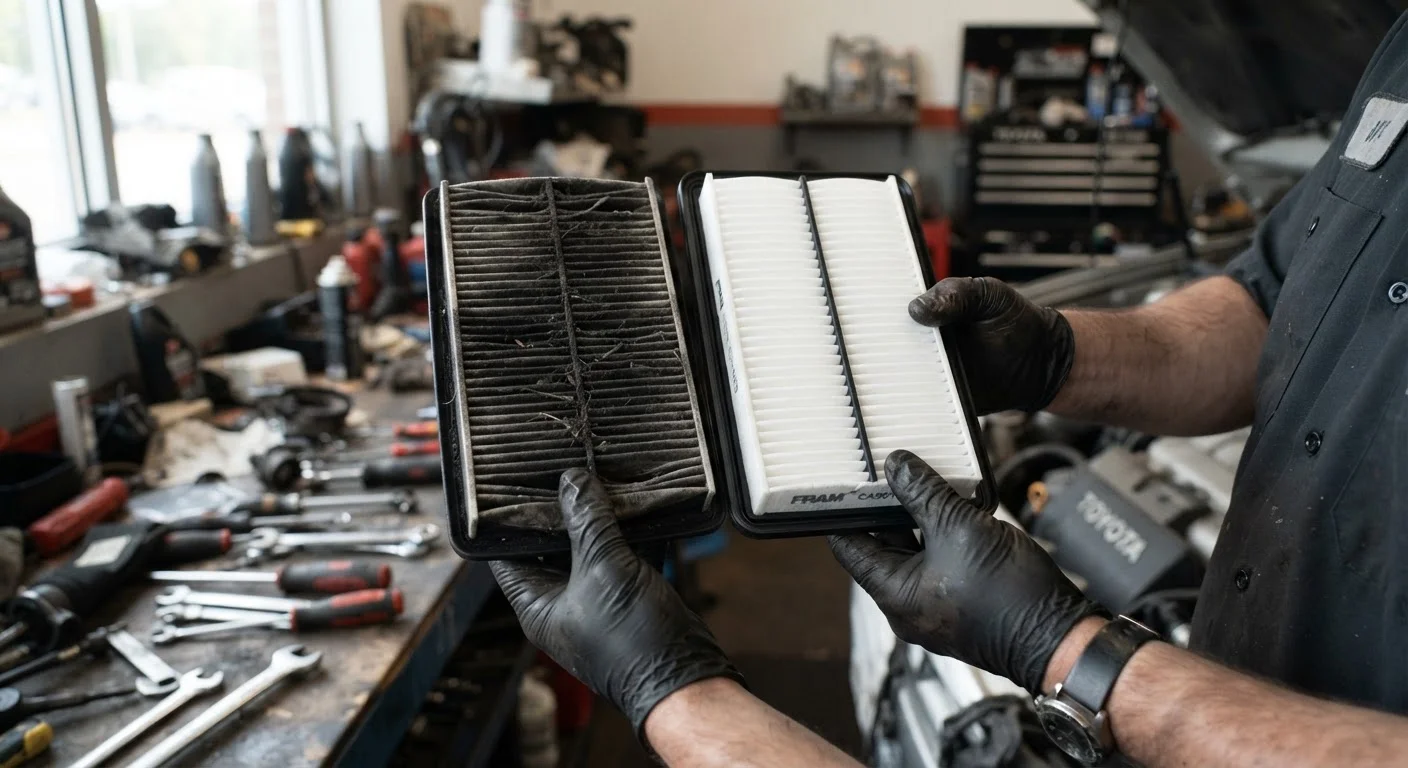
Hold the filter up to a light source. A serviceable filter will allow some light through. A filter that blocks nearly all light, shows caked debris, or has visible damage such as tears or collapsed pleats should be replaced. Light gray or tan coloration alone is not a disqualifying sign.
Install the replacement filter if needed
Insert the new filter in the same orientation as the old one - most filters have an arrow or a shaped frame indicating direction. Close and secure all clips or fasteners. Make sure the housing seats fully with no gaps, which could allow unfiltered air into the intake.
Locate and inspect the cabin air filter
Cabin air filters are most commonly found behind the glove box, under the dashboard, or under the hood near the base of the windshield. Your owner's manual will show the exact location. Remove any access panels or the glove box door as directed - no tools are typically required.
Assess and replace the cabin filter
Slide out the cabin filter and inspect it. Unlike the engine filter, cabin filters often trap leaves, insects, and visible debris - any significant accumulation warrants immediate replacement. If it appears clean and free of odor, it can likely continue in service. Install the replacement with the airflow arrow pointing in the correct direction as marked on the filter frame or housing.
When It's Fine to Wait
If your visual inspection shows a filter that's lightly dusty but still has visible pore structure and no debris buildup, it can typically continue in service until your next scheduled check. Light gray coloring alone doesn't mean failure - filters are designed to hold a meaningful amount of particulate before airflow is truly compromised.
Where your engine air filter is concerned, you can also tap it gently (outdoors) to dislodge loose surface dust, which may extend its remaining service life modestly. This is not a substitute for replacement but can be useful if you're between service intervals. Note that cabin air filters with visible mold, insect debris, or leaves should be replaced immediately regardless of mileage - these aren't cases where waiting is appropriate.
If you're curious how air filter maintenance compares to a similar task at home, the principles share some overlap with HVAC filter upkeep - though the components and stakes are different.